- House of Puff’s Nebula Rolling Tray is the key to rolling perfectly every time.
- The Nebula draws inspiration from a tray we found in Amsterdam.
- The keys to a perfect roll are a good rolling tray, filters, and good, ground mix.
7-minute read
An Amsterdam-Inspired Rolling Tray
The story of House of Puff’s Nebula Rolling Tray started in Amsterdam. Our founder, Kristina Lopez Adduci, got inspired in the vibrant Dutch capital learning how to roll. Luckily for Kristina, the Dutch are happy and kind (actual facts BTW). So, naturally, they offered to help. They brought her a plastic, M-shaped apparatus that was the color of Pepto Bismol and told her it would “helpen je rollen.” The plastic rolling tray was meant to help keep the paper tight and keep her mix in the middle of it throughout the process. With just a few tries, she had perfected her rolling skills, laying the foundation for the iconic Nebula Rolling Tray.
Bringing The Nebula Rolling Tray To Life
Kristina took her newfound knowledge about how to roll back to Brooklyn and immediately got cracking on a rolling tray of her own that would help others roll more easily. She also adapted the original design so it would double as a unique ashtray. A few prototypes later, and the Nebula Rolling Tray was born. Crafted to perfection and inspired by Kristina’s Amsterdam adventures, this stylish accessory embodies both functionality and flair, making it a must-have for any rolling aficionado.
 How To Roll For Beginners
The Nebula Rolling Tray makes it easy for anyone to roll their own. (And if you love our color palette, check out the artists who inspired it!) Here’s our beginner’s guide. Follow these steps, and you’ll be rolling like a pro in no time.
Treat Yourself to Some Rolling Supplies
Rolling your own doesn’t require much—just a few essentials. While some of these items can be substituted or left out entirely, in a perfect world you need your favorite blend, a grinder, rolling papers, filters (aka tips or crutches), a rolling tray, a moist cotton swab, and a tamping stick. Learn how to roll with these tools, and you’ll be all set.
Grind Your Blend
Why use a grinder? Grinding might seem like an unnecessary extra step that’s just for connoisseurs. But it’s key to making the most of your smoking experience for 2 reasons. First, we all want the best bang for our buck. Grinding gives you a smoother, deeper draw by optimizing airflow, thus maximizing the smoking experience. Plus, improved airflow helps prevent canoeing, ensuring an even burn the whole way. Don’t have a grinder yet? Check out all our clever tips for grinding with tools that are already in your kitchen.
Luxe Up Your Puff
If your throat is delicate or you just want to luxe up your puff, mix in some other aromatic herbs. Barbari Herbal makes delightfully thoughtful blends with great names, like Airplane Mode, and even better flavors. Our fave, Muse, combines peppermint, sage, raspberry leaves, and jasmine. Adding another herbal blend will cool down your smoke so much that even the lightest weight among us can partake without coughing.
Choose Your Fave Rolling Papers
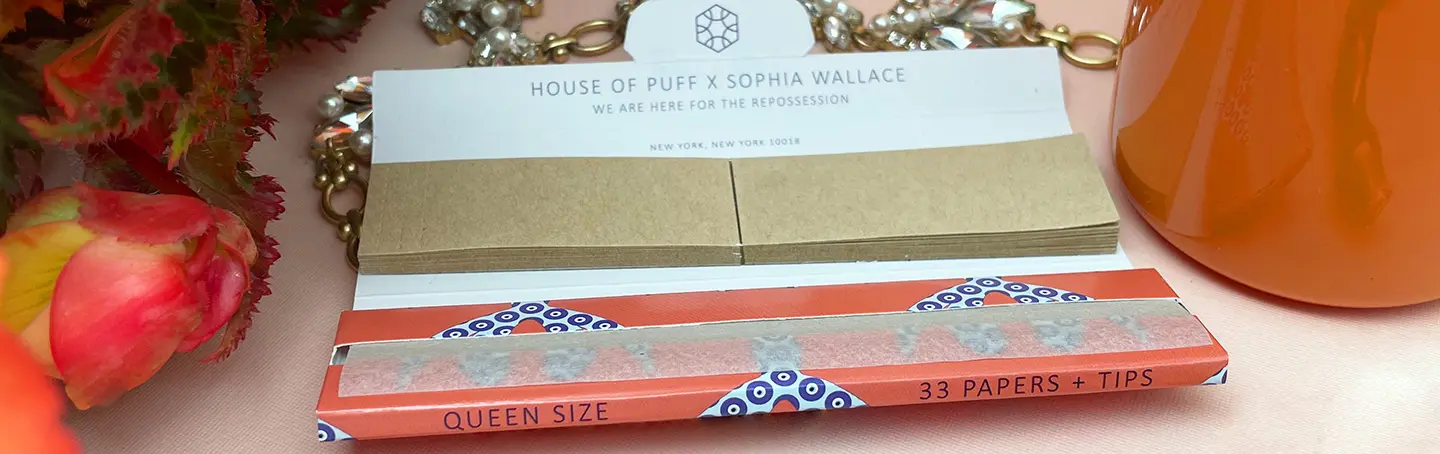
With the Nebula Rolling Tray, you have the freedom to use any size or type of papers. But king size papers fit our mini tray perfectly. Of course, we’re especially partial to House of Puff’s Artist Series Rolling Papers. They’re unbleached hemp. So they’re nice and natural. They don’t include anything that will interfere with the taste of your smoke. Plus, they come with thin, slow burning tips that are perforated to make rolling filters with them easier. The best part? A portion of the proceeds from each of our artist series papers supports either Solitary Watch, Housing Works, or the Pachamama Alliance.
How To Roll A Filter
Speaking of improving your smoking experience, filters are key. They make your smoke smoother. They also keep any mix from getting in your mouth. And, if you don’t have a holder, they keep your fingers away from flames. But filters can stymie the best of us.
4 Simple Steps for How To Roll a Basic Filter
Step 1—Start with the Right End
First, start with the short end of the tip (or the “crutch”). If you’re using House of Puff artist series papers, start with the edge that has the perforations.
Step 2—Roll Tight
Next, fold over the edge as small as you can—you can use the first perforations as a guide. Roll the tip as tightly as possible. Keep the edges aligned so you have a nice, straight tube.
Step 3—Get Rid of Any Stiffness
When you get to about ¼” from the end, focus on the unrolled part for a minute. Let the part you’ve rolled go and fold over the short edge to roll that side of the tip just like you did the first one. That’ll make your filter stay tight even when you let go. Then, unroll it again. To get any stiffness out, unroll the long end completely again.
Step 4—Roll it Up One Last Time
Finally, start from the end you started with and roll it all the way. Let go, and it’ll loosen a little. But, don’t worry, that will give you a perfectly rolled filter.
How to Roll For Improved Airflow
Why Learn How to Roll for Increase Airflow?
Ready to elevate your smoking experience? Along with your trusty M-shaped rolling tray, enhance airflow with an M filter for smoother draws and effortless lighting. By optimizing airflow, M filters take your smoke sessions to the next level by ensuring that you won’t struggle to keep your herb lit. With improved airflow, you’ll savor a more consistent and enjoyable smoking experience every time.
How to Roll an M Filter
Mastering the art of rolling the perfect M filter is easier than you think. Let the perforations on the tip guide you into making an “M” fold on the inside of your filter. Start with the same steps 1 and 2 outlined above. But, after the first fold, instead of continuing to fold the paper in the same direction, make your next folds at the perforations. But make them in the opposite directions until the paper is folded into a little “M” shape. Then, go back to step 3 above so that the M shape is rolled up in the middle of your filter. Continue with the rest of the steps and, voilá, you’ve got a fancy filter design.
Perfecting Your Roll
If you’re still leery of rolling your own, check out these instructions for using our Nebula Rolling Tray or follow Kristina’s steady hand in the video below about how to roll. In it, she lays out the step-by-step process with precision and a touch of finesse, making it easy for beginners and seasoned enthusiasts alike to master the art of rolling. A little patience and some practice is all it takes to learn how to roll. Plus, with Kristina as your guide, you’re in excellent hands. You’ll be rolling up perfectly on your own in no time.
How To Roll Using The Nebula Rolling Tray
The Set Up for How to Roll
Your Nebula Rolling Tray will work with any size paper. To get started, simply lay your paper lengthwise on the tray. Make sure the the crease of the paper falls right into the dip in the middle of the rolling tray. When you lay the crease of your rolling paper in the dip of the tray, you’ll automatically position your paper the right way. You might not notice it at first, but one long side of the rolling paper will have adhesive on it. It’ll look shinier than the rest. In order to seal the roll, you want the adhesive side of the paper facing up and on the far side of the tray from you.

Add Your Filter
Place your perfectly rolled filter in the crease of the paper at one end of the tray. Line up the edge of the filter with the edge of the paper. Then, hold them in place with your thumb.
Add Your Mix
Now that you’re set up, evenly sprinkle your ground mix into the crease until it fills up half the paper’s width. The rolling tray will help keep everything in the middle. Remember to leave a small gap at the non-filter end. That’s so you have enough space to seal it up. This approach guarantees a well-packed and tightly sealed roll.
Get Rolling
Pinch the paper between your fingertips and lift the filter end. Next, tuck in the non-adhesive side of the paper, and roll the paper back and forth over the filter between your fingertips to get a tight fit. Wet the adhesive at the filter end and press it down. As you continue to pinch and fold, use the dip in your rolling tray to help you roll the paper into a cylinder as you go. Go slowly, wetting the glue before pressing it into place. Use a tamping stick to lightly compact your mix through the open end. And, if there’s space, add any extra mix. Finally, twist the paper to seal the lighting end. Admire your work and enjoy!
Our Trusty Tamping Stick
Once you’ve mastered the art of rolling, there’s a subtle yet essential tool that can take your sesh to the next level: the tamping stick. Using a tamping stick is a game-changer when it comes to achieving an even burn. By gently packing down your mix, you create a more even surface, ensuring consistent airflow all the way through. This not only enhances the flavor and potency of your mix but also prevents waste through uneven burning and canoeing.
Roll On With Your Good Self
Learning how to roll your own doesn’t have to be intimidating. Whether you’re a novice or a seasoned smoker, perfectly crafting your own experience is the ultimate satisfaction. Remember, it’s not just about the end result. Instead, take your time, enjoy the ritual, and roll on with confidence.